Before You Begin
For some classes, your Citrix virtual desktop has already been provisioned for you. You can try the instructions below to view your workspace.
If you find that you do not have access, please send a request email to:
In the subject line, please include:
- (Undergrads) – Citrix ASP Access Request – UGBA 104
- (MBAs) – Citrix ASP Access Request – MBA 240
Have questions? Jump straight to the FAQs.
- The recommended browser for the virtual desktop experience is Google Chrome.
- Make sure you do not have pop-up blockers enabled, to ensure that it does not prevent you from launching applications.
- The first time you access the Berkeley Citrix site, you may be asked to allow the plug-in or add-on to run. Click Allow or Always run.
- It may take up to 1 minute to start your ASP Virtual Desktop the first time
- If you do not see your ASP Virtual Desktop after clicking on it, make sure it did not start behind another window – it might be hiding in the background
- Applications launched via Citrix look like the native applications for your operating system
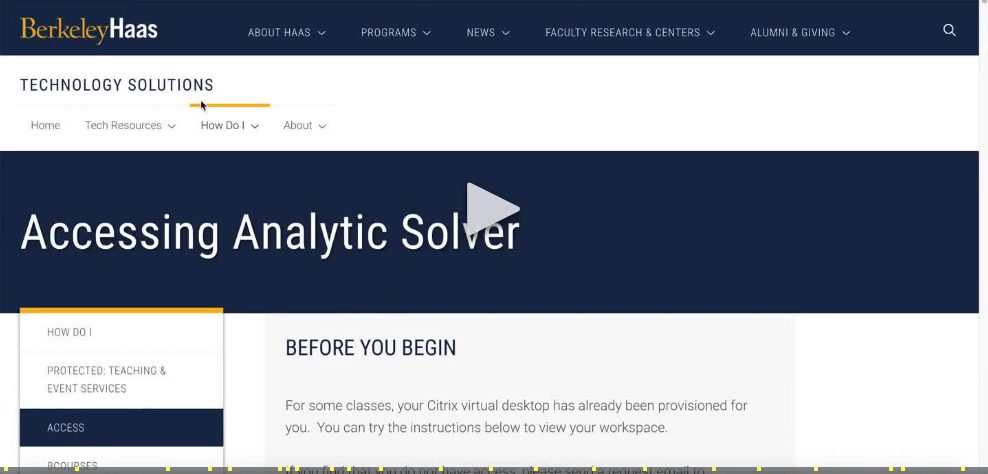
Video Tutorial
▶ Accessing Citrix-ASP Video Instructions here (5:59):
Step-by-step Instructions
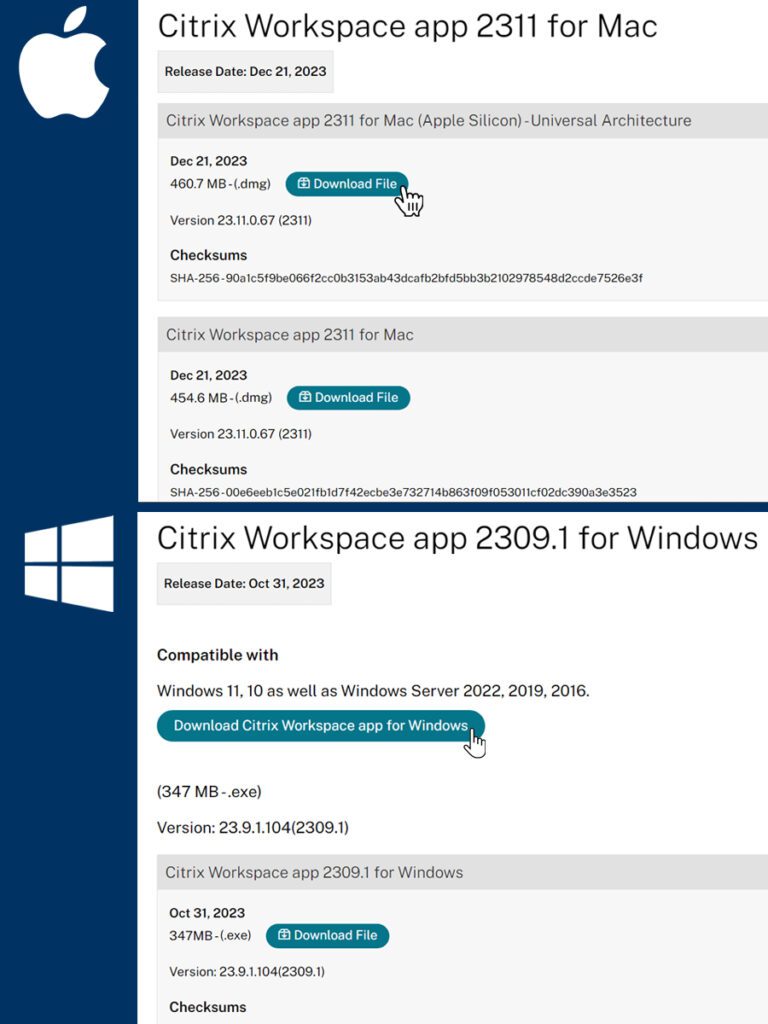
1. Get the Citrix ASP App
ℹ YOU DO NOT NEED TO LOGIN TO THE CITRIX APP |
Download the app for your specific operating systems through the links below. The latest release is ver. 2104 for Mac, and ver. 2105 for Windows:
- Click “Download Citrix Workspace app for Mac/Windows”
- Install with default options
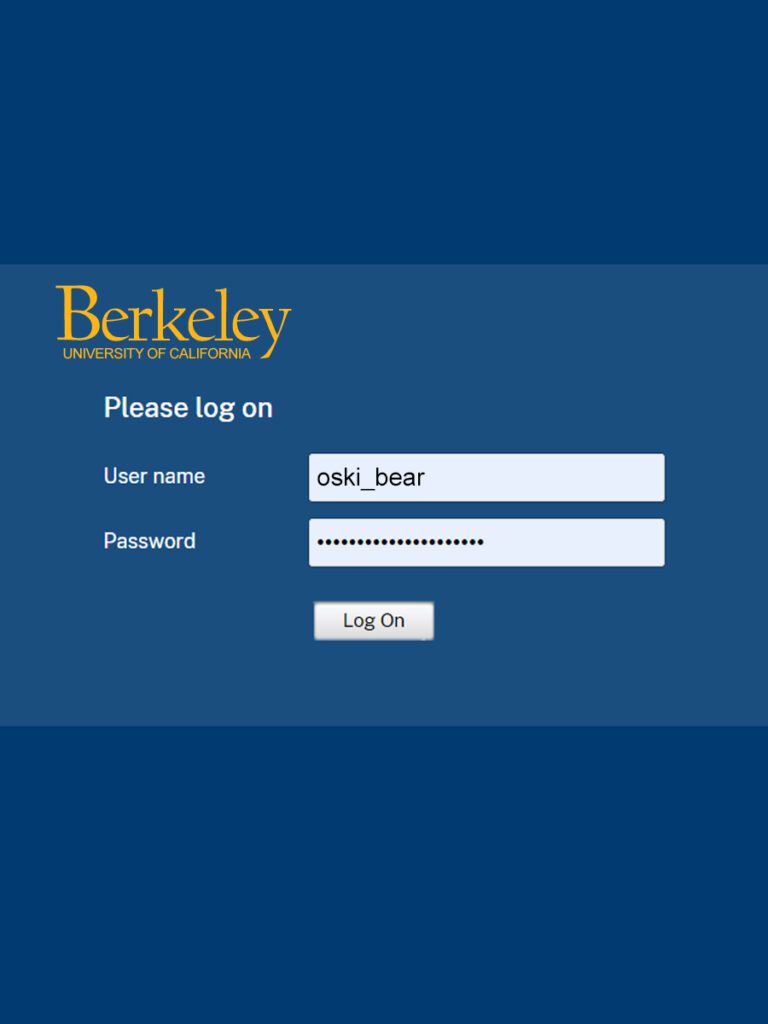
2. Access the Berkeley Citrix Site
GOOGLE CHROME BROWSER RECOMMENDED
![]()
Once you have installed the Citrix Workspace App, go to https://citrix.berkeley.edu and log in with your CalNet credentials (ID, passphrase, and 2-Step authentication).

3. Detect Receiver
Click “Detect Citrix WorkSpace app” and accept the agreement if necessary.
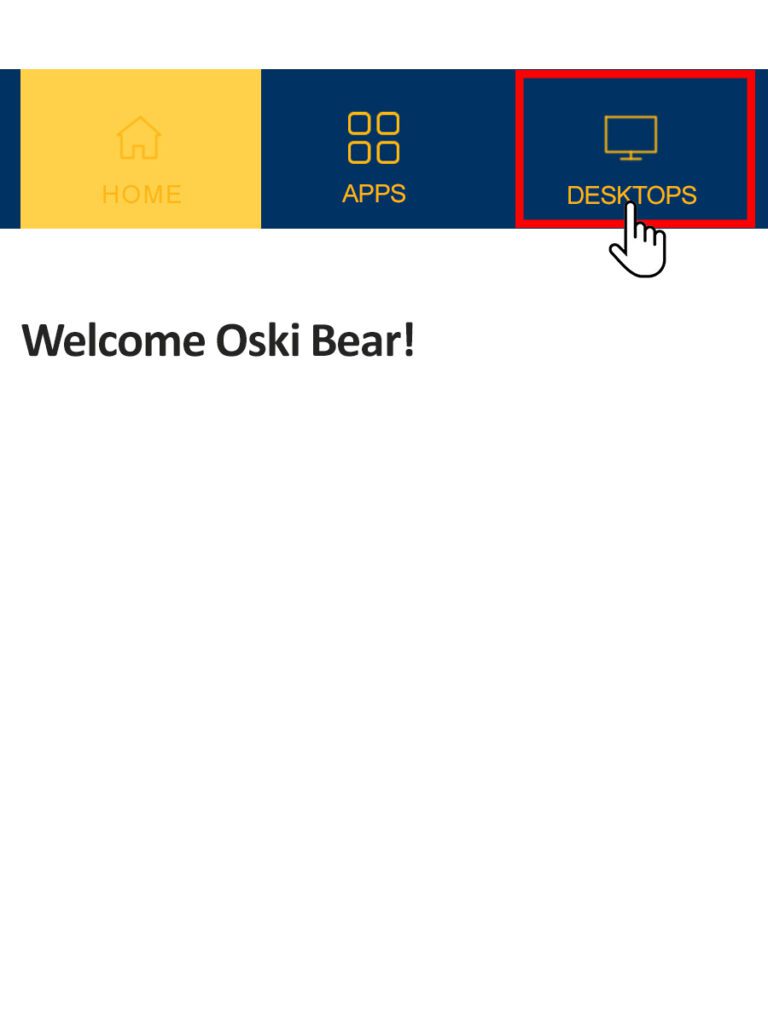
4. Click "Desktops"
Once you are logged in, Click the “Desktops” Tab on the top of the screen.

5. Launch ASP
Once in your Virtual Desktops, click on the ASP icon to launch. It may take 1 minute to launch with the first use; if you do not see an application after clicking on it, check to make sure that it did not launch behind another window.
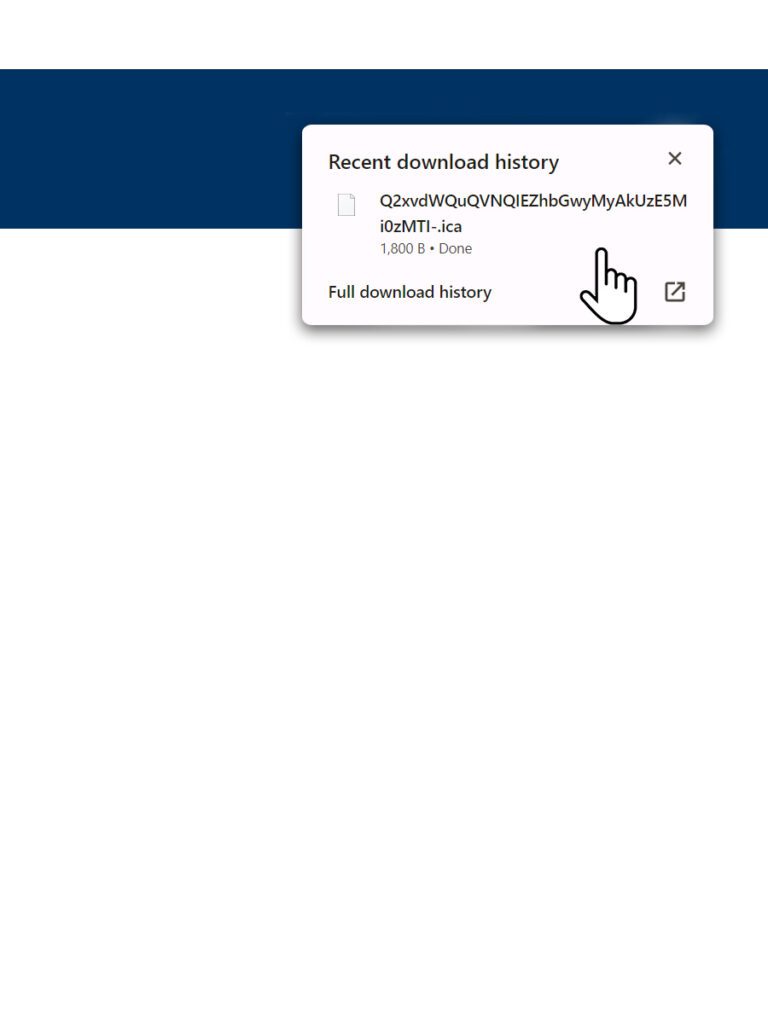
5-1. Citrix .ica File
In some instances, users will see a temp Citrix .ica file download in the either the top right corner, or bottom left corner of their screens.
In these cases, please click on the file to launch the Virtual Machine. This step may need to be performed each time you access the Campus Citrix/ASP Virtual Machines.
NOTE: The file may appear, or be hidden behind any other window(s) you might have open in the background.
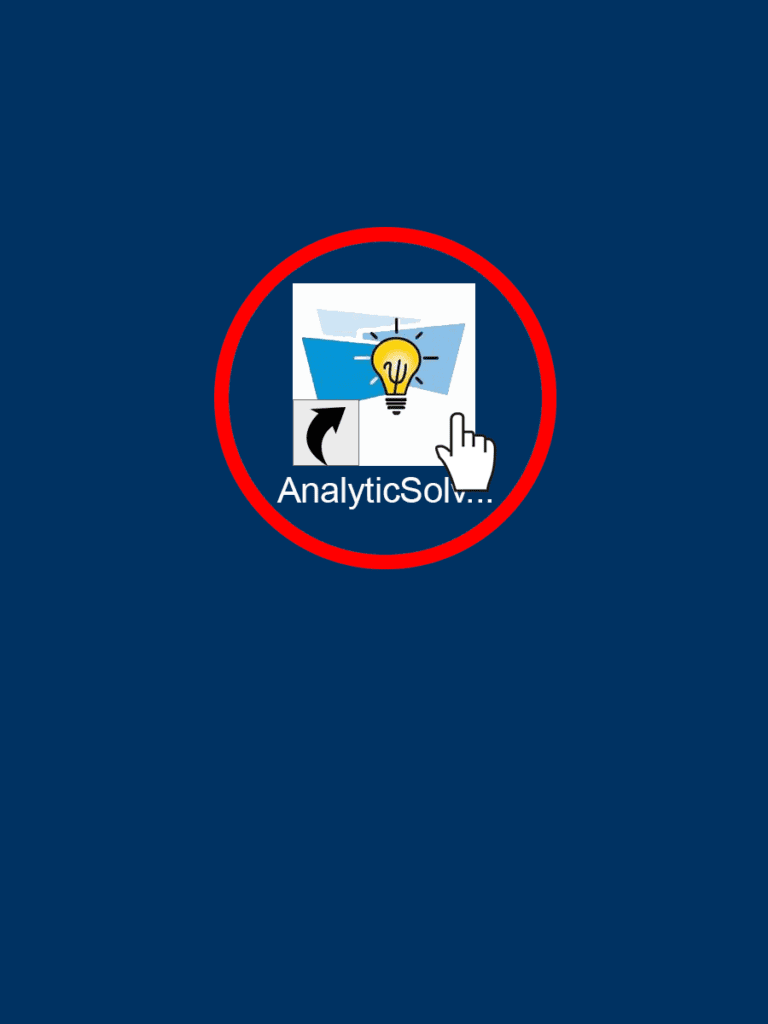
6. Launch ASP
A Windows 10 Virtual Desktop should now be accessible to you. DOUBLE-CLICK on the “Analytic Solver” shortcut to launch the program.
NOTE: whenever you’re in the virtual environment, launch ASP by double-clicking the virtual desktop ASP icon only, in order to use the Campus ASP license. Do not open Excel first, or launch from outside the virtual environment, as this may trigger the Frontline Solvers’ request for an independent (non-Campus) ASP license.
You’ll need to perform this step each time you access ASP through the virtual desktop.
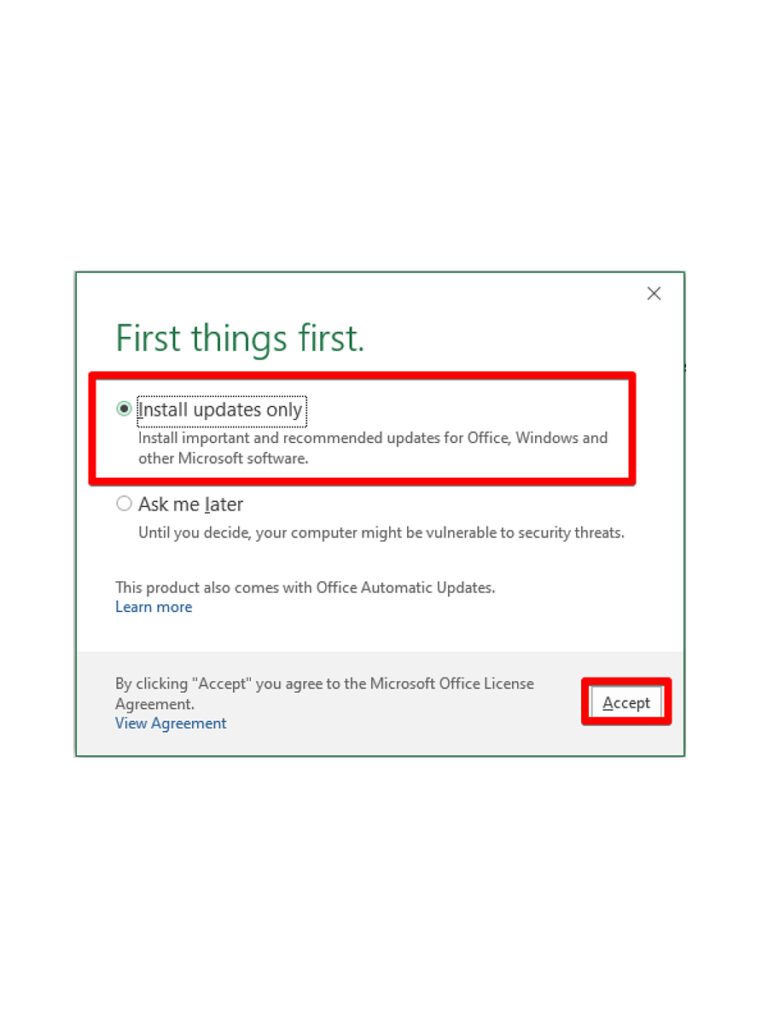
6-1. Accept the MS Office Popup
A pop up from Microsoft will appear. Click on the “Install updates only” option, and then “Accept.”

7. Analytic Solver/Data Mining Tabs
In the ASP/Excel top menu, you should now be able able to select either the “Analytic Solver” or “Data Mining” tabs.
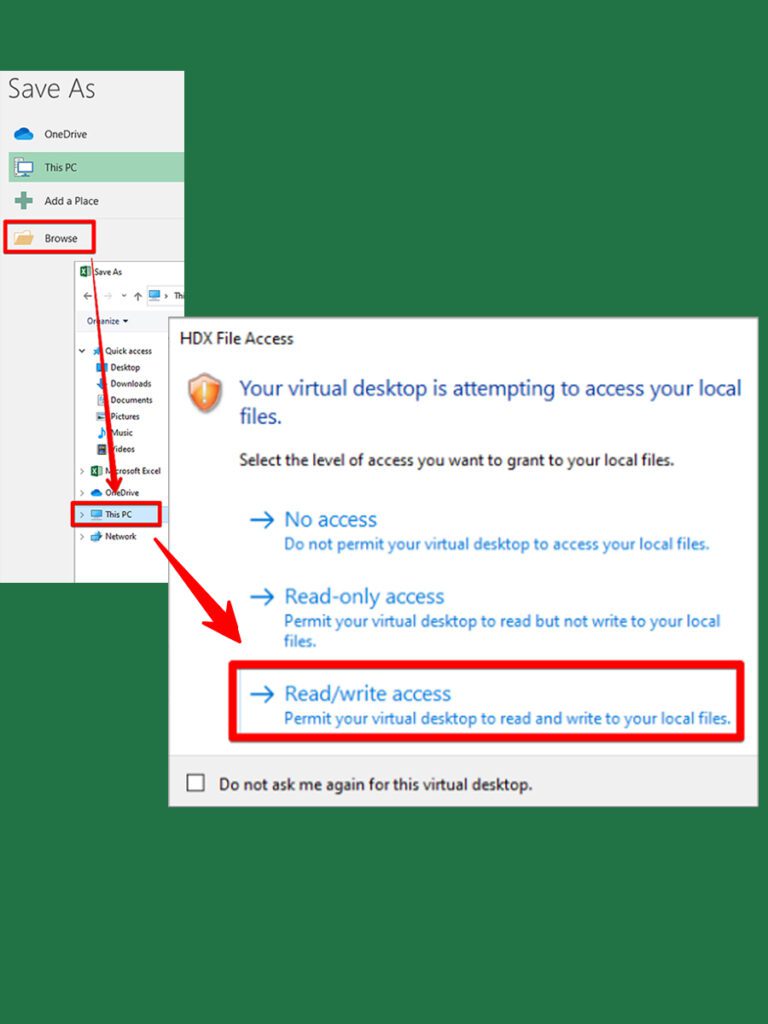
8. Saving Files
Save your files to your computer’s drive, to an external storage, or to a cloud solution, like your bDrive.
When opening File Explorer, or saving a file, make sure to select “Read/Write access” in order to save files to your computer.

You should see a list of your Devices and drives. Choose the local drive to save your file to – typically, on Windows, this is (C:), and on Mac, this is (H:). But drive letter assignments may be different on some systems, so check to make sure that you are saving to your preferred location.
Important: It is recommended that you save your files locally or in the cloud, instead of the virtual desktop. The virtual desktops are cleaned and updated periodically (every Friday night), and temporary files saved here will be deleted. Always save to your local or cloud-based storage solutions.
8-1. Loading Pre-Existing Files
To learn how to find and load pre-existing files which you have downloaded and saved locally to your computer, watch the videos below:
9. Disconnect from Citrix
When you are ready to end your virtual desktop session, first make sure that your files were saved successfully to your chosen location. Remember, the Virtual Desktop is reset every Friday night, and files saved onto them are deleted permanently.
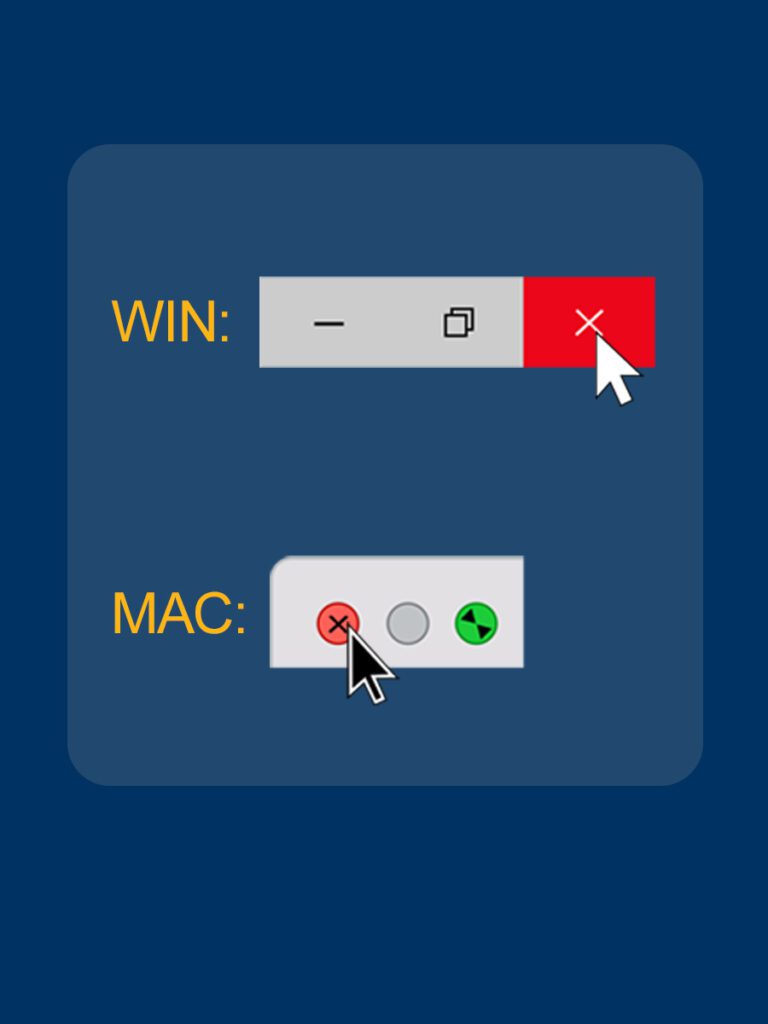
Once you’ve confirmed this, you can disconnect from Citrix by closing out your session (X) at the top (right for Windows, left for Macs).
FAQs
For frequently asked questions, follow the link below:
Help Desk
If you have questions regarding these instructions, you can email [email protected].
Student Consultant Drop-in Appointments
For one-on-one consultation (through Zoom), make a Student Drop-in Appointment here.